IMG_4321

Taco Night!


IMG_4320In the mood for a quick dinner? How about the ever-adaptable tacos? You only need a handful of ingredients, some of which you probably already have in the fridge or pantry, and about 30 minutes to whip up a tasty meal. Below, we provide you with our favorite vegetarian tacos, with sweet potato and a fried egg bulking things up in the absence of meat. Follow our guide to create some great tacos tonight:

1) Preheat the oven to 400F. Cut 2 sweet potatoes into small cubes. Toss them with some olive oil and cumin, then spread them on a baking sheet and bake for about 30 minutes or until they’re tender, stirring once during baking.

2) While the sweet potatoes are baking, prepare guacamole: mash 1-2 avocadoes with lime juice, 1 clove of minced garlic, minced cilantro, 1 diced tomato, and a pinch of salt.

3) Chop or slice thinly ½ head of cabbage or some crispy lettuce (like iceberg).

4) Grate some cheddar cheese.

5) Chop 1-2 tomatoes.

6) Once the sweet potatoes are done, put all the toppings out on the dinner table. Warm up some tortillas and fry an egg. Stack away and enjoy!

IMG_4321

Remember that this is less a “recipe” and more a grounds for experimentation. Feel free to add or subtract toppings to your taste. Sour cream and refried beans are also common taco toppings. If you’re a meat lover, sauté some ground beef or diced chicken pieces with tomato puree and chili powder. We like to gather as many different colors as possible – just “for the fun of it”!

Cheesecake Stuffed Strawberries

Memba These?  They were featured on our Summer Solstice Party Menu.  Thought this recipe might come  in handy for your Labor Day picnics! You’ll be the new favorite party goer or thrower!

Cheesecake Stuffed Strawberries

Ingredients:

-1 lb of LARGE strawberries
-8 oz. cream cheese, softened (can use 1/3 less fat)
-3-4 tbsp powdered sugar (4 tbsp for a sweeter filling)
-1 tsp vanilla extract
-graham cracker crumbs

Directions:

1. Rinse strawberries and cut around the top of the strawberry. Remove the top and clean out with a paring knife, if necessary (some may already be hollow inside). Prep all strawberries and set aside.
2. In a mixing bowl, beat cream cheese, powdered sugar, and vanilla until creamy. Add cream cheese mix to a piping bag or ziploc with the corner snipped off.
3. Fill strawberries with cheesecake mixture. Once strawberries are filled, dip the top in graham cracker crumbs. If not serving immediately, refrigerate until serving.

IMG_4631

Strange Food of the Week: Pepitas

Not Such a Bad Seed 

After becoming settled in my new apartment at Kent State University, I drove to the local Giant Eagle to stock up on some cliché college food and caffeine. When walking up and down aisles in search of chocolate for some much needed brownies, a box caught my eye: Roasted and Salted Pepitas. I picked up the container, read the label, and could not figure out what on earth I was holding. While I usually would have placed the item back down and continued to search for chocolate, I decided to buy the inexpensive container and find a recipe for the unusual food.

I got back to my apartment and searched the Internet for an explanation of pepitas. After a few minutes of Googling I found out that they are the seeds of a pumpkin or squash and often used in cooking or even just eaten as a snack. I came across a recipe for Pepita Salad and after reading over it, I decided to put my brownies on hold and give it a try.

For the salad I used:

1 cup pepitas, roasted and salted
1 cup cilantro leaves and stems, well washed
1/3 cup Parmesan cheese, freshly grated
3 medium cloves garlic, peeled
juice of 1 medium lemon
1 serrano chile pepper, minced (optional)
2/3 cup extra-virgin olive oil
4 cups cooked yellow split peas
1 bag of lettuce of choice

First, I washed and chopped the cilantro, placed it in a medium sized bowl, and added 1/3 cup of the pepitas.


I then peeled and diced the garlic, squeezed the lemon juice, and chopped the chile pepper. I combined these ingredients with the cilantro and pepitas and added the olive oil and Parmesan cheese to the mixture.


In a large bowl I tossed the lettuce, remaining pepitas, and ingredients from the medium bowl until everything was fully coated. I then added the cooked split peas to the salad and tossed everything again. To cook the split peas, I brought six cups of water to a boil, added two cups of split peas, and cooked for 20-30 minutes. I then drained the peas and added salt to taste.

I made myself a plate, sat down, and enjoyed!

~Kerry~

Smoothies_2-1

Beet Week Day 7 – A Smooth Finish

Your Heart Might Skip a Beet – Beet Smoothies

We are all guilty of over-extending ourselves at times, but just because you’re busy doesn’t mean you shouldn’t eat healthily. Some of the best “on the go” snacks are high in nutrients. For someone like me that loves fresh fruit, smoothies are the perfect snack to grab on my way out the door.

Prep time for smoothies is pretty minimal (5 minutes tops!) You can use a blender or food processor to combine all of your ingredients together into one delicious drink.

For my smoothie, I used:

½ raw beet

½ banana

½ orange

¼ apple

1 tsp honey

6 oz. yogurt

This makes 1-2 servings depending on the size of your glass. To be honest, I was shocked at how good it tasted. I coaxed my grandma into trying it too and she loved it!

You can use any combination of the ingredients above and you can substitute a non-dairy product or even ice cubes for the yogurt.   Smoothies are forgiving and can be tweaked until they taste just right. The beets not only add a bright pop of color, but a surprisingly satisfying sweetness.  What a great way to start or end your day!

~Rebecca~

DSC_0846

Beet Week Day 6 – Seeing Red

Working with beets, it doesn’t take long to realize the opportunity for color. We’ve already produced hot pink cupcakes, deep purple salads, orange hued stews, all the while seeing red – everywhere; hands, counter tops, sinks, pans…

Rebecca Under the Influence of the Beet

So why not try it as a makeup?  Red beets provide a green alternative to the usual chemical dies found in commercial products and  can be unbelievably simple to apply.  For a light pink to deeper red lip stain, simply rub a raw slice of beet across your lips.  The color is safe and healthy and will last for several hours.

Want to create a more traditional lip gloss?  Simply mix beet juice with a small amount of olive oil and a touch of powdered sugar to thicken the mixture.  Other “recipes” call for melted beeswax and a mixture of castor oil and sesame oil all whipped together before introducing the beet juice. This recipe can be put in a container and used over time.

Beautiful, practical, healthy, easy and affordable.  Oh – and of course – tasty!  Get ready to kiss your old lipstick good bye!

The Otherworldly Beet


AxfIDmdCAAAeFEG-300x199

Beet Week Day 5 – Let’s Spice it Up

хрін (khrin)

In Ukraine, this spicy sweet condiment or salad called khrin (хрін) is a traditional Easter dish, but it is known and used throughout the world under a variety of names and for a variety of purposes.   In the US, it is commonly referred to as Red <Beet> Horseradish and its bright pink color makes it an interesting addition to more typical condiments.

Ingredients

  • 2-4 stalks of fresh horseradish, grated
  • 1-2 raw beets, peeled and grated

Procedure

  • Peel and grate raw beets. Let them sit for a little while and then squeeze the juice out.
  • Grate the horseradish and put into a bowl (note: the grating of the horseradish releases an enzyme that creates its spiciness.  As the grated horseradish sits,  it will become spicier – to a point – however if left too long, it will lose that pungent flavor and become bitter).
  • Add the beet juice to the horseradish and mix (note: adding the beet juice counteracts the enzyme and stops the spiciness from perpetuating.  Additionally, the beets add a sweet flavor which further mellows the horseradish)

Khrin is a delicious accompaniment to any sort of cooked or cured meat.

On that spicy note – Happy adventures in Ukrainian cooking-with-beets! Leave a comment if you have other favorite beet-related or Ukrainian recipes.

Смачного (smachnoho)!  ~Tammela~

Other names this (or a similar horseradish) dish is known by:

Central and Eastern Europe – khreyn or keen.

Poland  – ofchrzan

Czech Republic – křen 

Lithuania – krienai

Russia – хренkhren 

Hungary - torma

Romania – hrean

Bulgaria – хрян,khryan

 Slovakia – chren


Beet_Week_9

Beet Week Day 4 – Cupcakes

If You Can’t Stand the Beet, Get Out of the Kitchen

I know what you’re thinking…beet cupcakes?! Sounds pretty crazy, huh? For a beet hater like myself, I’ll openly admit to my skepticism. To me, beets are sickeningly sweet, but when they’re baked into pretty little treats, they can actually taste amazing!

You’ve probably passed beets in the supermarket without giving them the time of day and I can’t really blame you, but what you might not know is that beets are actually an incredibly healthy food – super foods in their own right. Joining garlic, green tea and flaxseed, beets can help prevent cancer. They have no trans fat, no saturated fat, are low in calories, and are a great source of iron.

The perfect beet is hard to come by; it should be deep red with roots extending from the bulb. Crisp greens are also a good indicator that your beets are fresh. You’re going to cut these off for your cupcakes (trust me, I tried it, they’re disgusting in cupcake batter and frosting batter.)

Follow the steps to make beet puree  from the beet margarita recipe (Beet Week Day 3). In a nutshell, you’ll be roasting 3-4 beets wrapped in foil at 400 degrees for about 45 minutes. Unwrap, run under cold water and peel the skins off…they come off extremely easily.

Cut the beets into quarters (maybe smaller depending on the size of your beets), and put them in the food processor or blender.

3-4 beets will yield about a cup of beet puree. Set this aside.

Here’s your Beet Cupcake Recipe:

½ C Sugar

1 ½ C Flour

2 tsp Baking Powder

½ C Butter (1 stick)
2 eggs

½ C Milk

2 tsp Vanilla

1 C Beet Puree

Depending on how big your cupcake pan is, this recipe creates about 12 cupcakes.

First, combine the dry ingredients in a bowl (sugar, flour, baking powder). Cream the butter in a mixer; if you don’t have access to a mixer, soften the butter in the microwave for 10 seconds and use a spoon to soften it up for your cake batter.

Whisk your eggs in a separate bowl and add the milk and vanilla to it. Slowly add the dry mix to the wet mix and stir continually.

Once your batter is nice and creamy, fold (mix) in the beet puree.

Use a ladle or spoon to portion your batter into your cupcake pan and bake at 350 for 25 minutes.

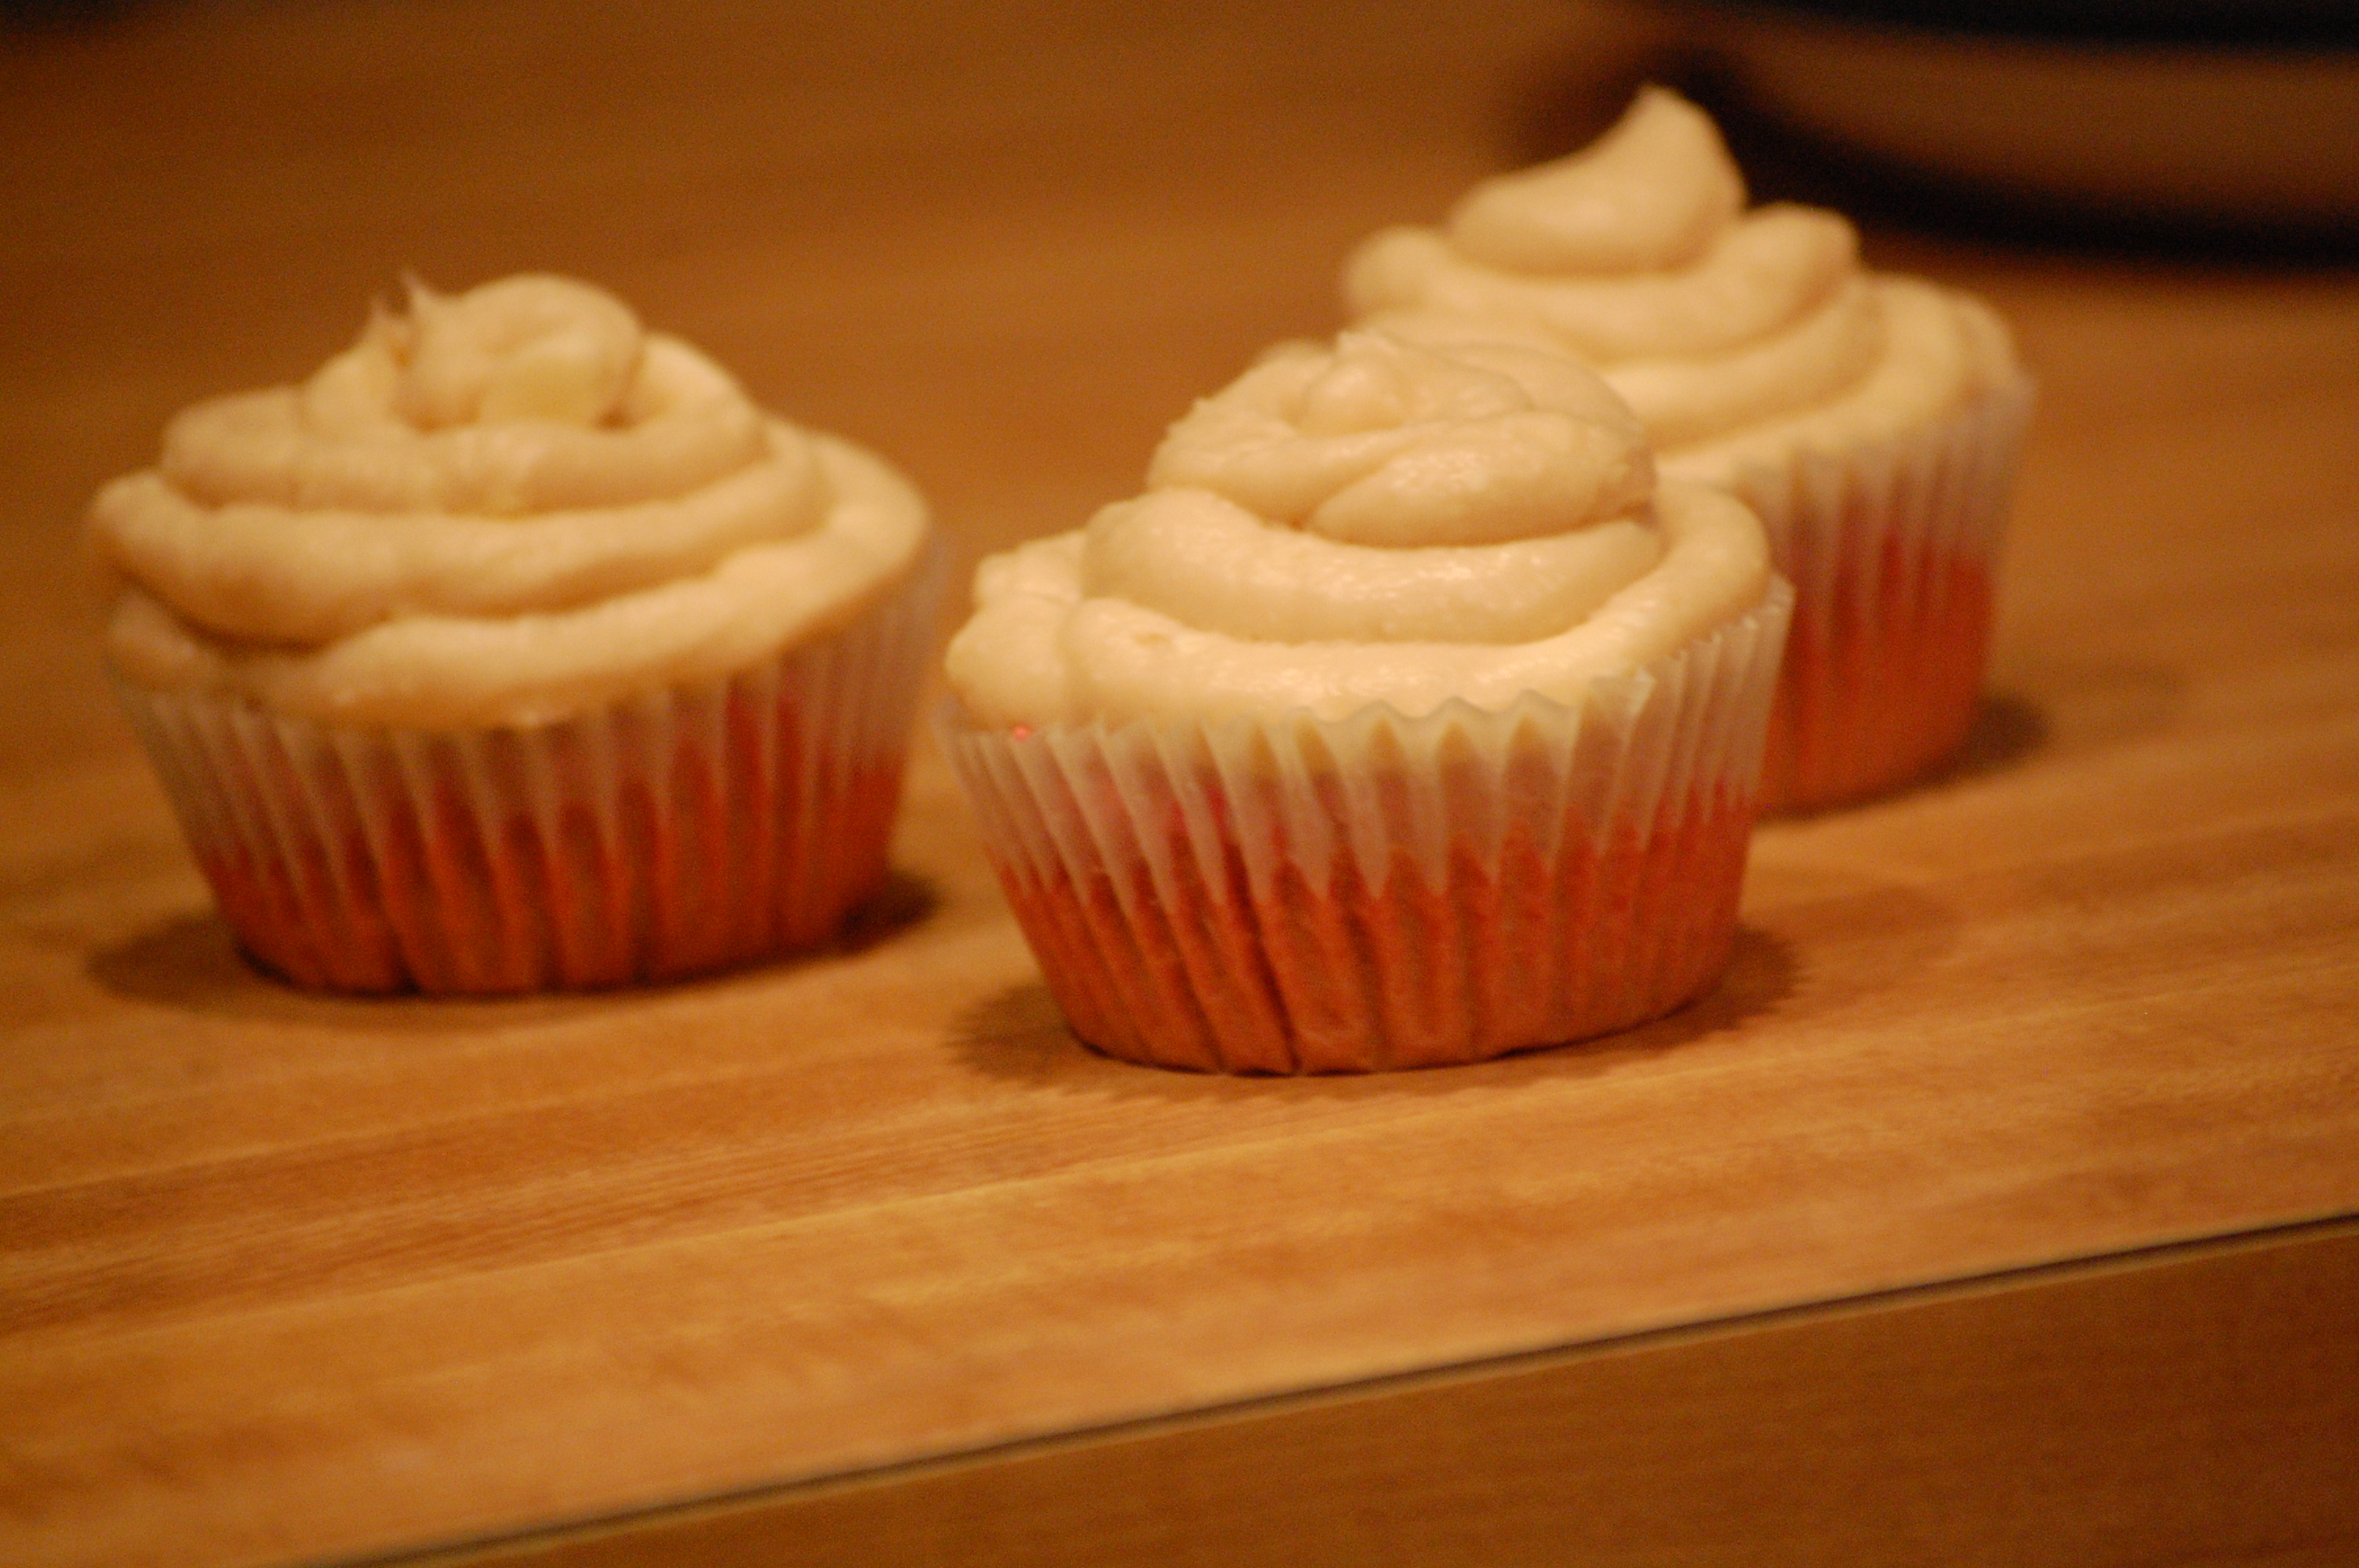
And remember, a cupcake is nothing without frosting.

Vanilla Cream Cheese Frosting recipe:

½ C Butter (1 stick)

8 oz Cream Cheese (1 package)

1 C Powdered Sugar

2 tsp Vanilla

Cream the butter and cream cheese together in a mixer until malleable. Add the powdered sugar in SLOWLY; you don’t want it to splash back in your face. Finally, add in the vanilla and let the mixer go for 30 seconds or so. It sometimes helps if you take a rubber spatula and scrape down the sides so all of the deliciousness is contained.

I realize not everyone has pastry bags to pipe out their frosting (I’m lucky; my mom’s a chef!) Be resourceful though…plastic freezer bags can act as pastry bags. Put the icing in the bag using a rubber spatula.

Zip the plastic bag shut and squeeze the frosting down to one end. Hold the bag in a diamond shape so one of the tips is pointing down like this:

…and snip the tip off! Once your cupcakes are cooled, you can make them look pretty.

I bought all of my beets from local farmer’s markets. You might have one near you too! If you’ve never been to a farmer’s market, it’s a really cool place where you can buy fresh fruit, vegetables, and other goods to support your local farms.  As an added bonus, the  produce is usually much cheaper and fresher at farmer’s markets.  In Cleveland, (as in other places – see below* for a sampling) you can find them listed on one site: localfoodcleveland.org.

Enjoy your beet cupcakes! Please comment with pictures of your own cupcakes or other beet concoctions (:

-Rebecca-

*Many states, regions and cities have sites listing farmers markets- here are a few examples.

California

New York City

Chicago

Denver

Minneapolis/St. Paul


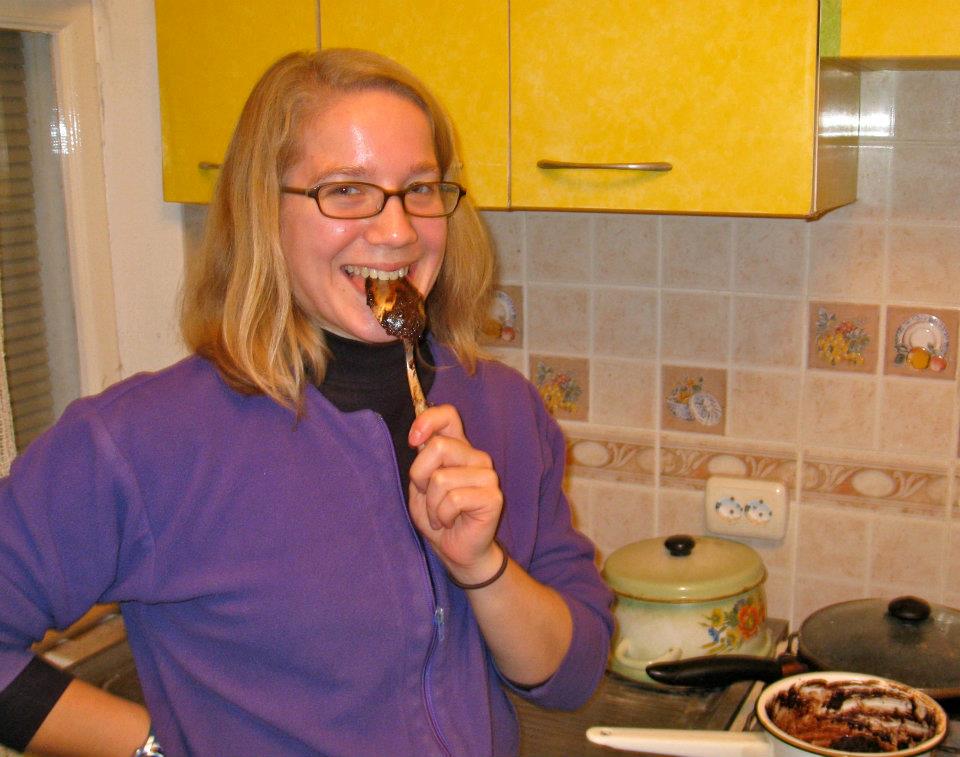
ps – during our experimentation with different recipes, we also tried these cupcakes with a canned chocolate frosting.  We found this to be a respectable (and tasty) alternative.
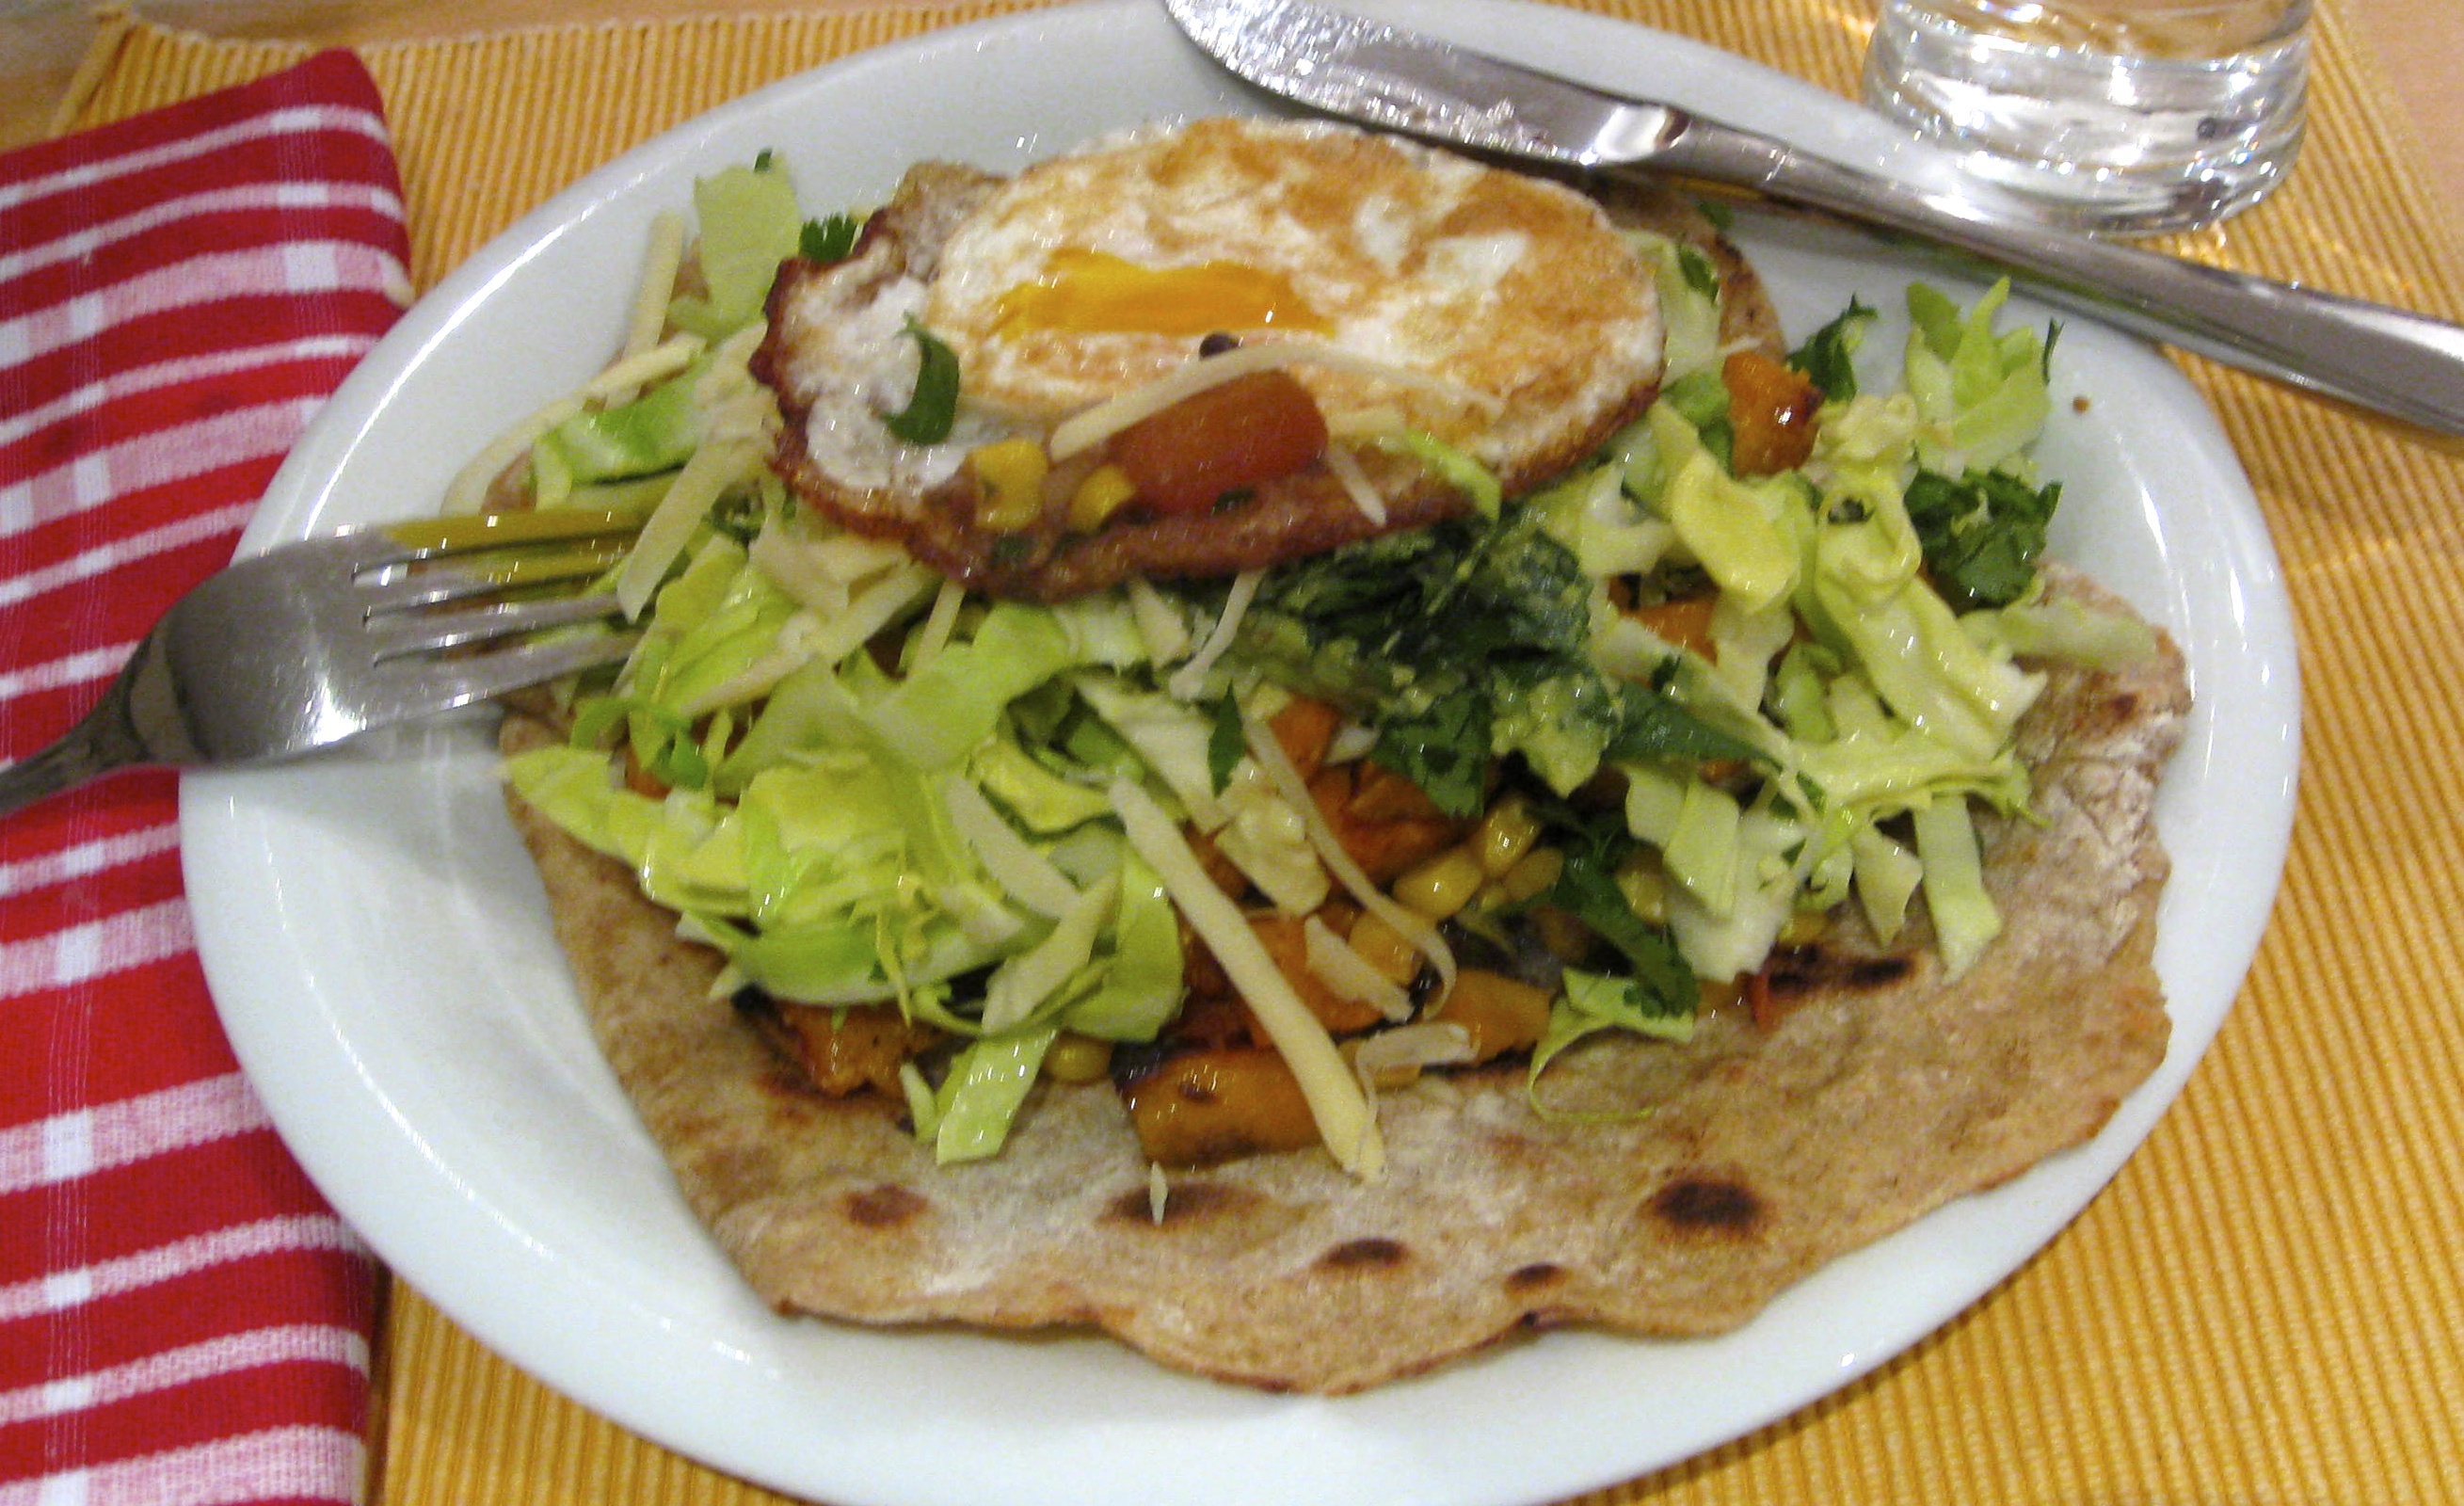
photo-55

Beet Week Day 3 – Happy Hour

BEET MARGARITA – SO WORTH A TRY!

We first discovered this margarita at Light Bistro  in the trendy Ohio City  in Cleveland, Ohio.  There were two of us – one a beet lover and one – well – not so much.  The consensus?  DELICIOUS!  Sweet and Tangy and smooth as could be.  This could be a game changer for folks who’ve always hated beets.

Beet Margarita Recipe

1.5 oz Tequilla (they used Jose Cuervo – but we love Leyenda del Milagro Select Barrel Reserve Silver)

.5 oz Triple Sec

1 oz Roses Lime Juice

.5 oz Lemon Juice (increase/decrease lime and lemon juice to taste)

.5 oz Roasted Beet Puree (see recipe below)

Mix ingredients in a shaker with ice and pour directly into a martini glass.

Note:  Other recipes call for orange juice, cilantro syrup, muddled oranges and agave nectar.  Some use a salted rim and some a sugared rim.  Some serve the margarita in a traditional glass over ice.   Be brave – be bold – be beetiful!

Roasted Beet Puree

Preaheat oven to 400 degrees

Using Fresh Beets:

Remove greens (cut them off close to the beet)

Wash beets to remove any loose dirt

Wrap each beet in foil and place in 400 degree oven

Cook beets for 45 minutes

Remove the foil wrapped beets and let them cool to the touch by running them under cold water.  Skin should peel off easily.

Discard skins and use a food processor or blender to puree the beets (as smooth as you can get them).

If you are adverse to beets, be sure to use cheese cloth or a chinois strainer to drain juice and avoid beet particles in your cocktail.  If you’re a beet lover, you might enjoy the little bit of thickness from the puree, especially if you are pouring your margarita over ice.

Follow recipe above and mix, pour and drink.  BEETlicious!


379475_612614224064_2140666440_n

Beet Week – Day 2 “Salat” Recipes

The BEET goes on in Tammela’s Ukraine kitchen…

As you all may know by now, I’ve been living in Ukraine as a Peace Corps Volunteer since September 2010 and thus have had plenty of time to taste – and sometimes cook – many traditional Ukrainian dishes. A lot of these dishes include the staple (mainly root) vegetables that grow so easily and abundantly here in eastern Europe: potatoes, carrots, onions, cabbage, and beets. It is amazing how many different combinations and variations one can create from just these five vegetables.

Most people are quite familiar and comfortable with cooking and eating potatoes, carrots, onions and even cabbage. But I have found that beets challenge and puzzle many cooks. They are a funny shape, have a thicker skin than potatoes or carrots, and are (usually) a deep red-purple color that stains almost everything it touches.

How the heck does one cook and eat a beet?

That is what I am here to tell you!

I developed a passion for beets several summers ago while shopping at farmer’s markets in the States. That first summer I experimented with beet preparation: I roasted, boiled, and sautéed beets, sometimes alone and sometimes with other root vegetables. Some dishes turned out well and some failed. Living in Ukraine for the past year and a half has expanded my how-to-prepare-beets horizons.  Following your introduction to Borscht, I shall now introduce you to some other classic Ukrainian dishes that feature beets.

These beet-sporting Ukrainian dishes, which are often made for holiday meals but are equally as good for regular consumption include salat vinehret (салат вінегрет), one of my favorite salads; and salat shuba (салат шуба; shuba means “fur coat”), which is a bit of an acquired taste.

Hope you enjoy!

Tammela

 салат вінегрет (salat vinehret) 

The vegetable proportions are generally about equal, but feel free to add more or less of anything, to your taste.

Ingredients

  • 1-3 small-medium potatoes, peeled
  • 1-2 medium beets
  • 1-2 medium carrots
  • 1-2 medium dill pickles (preferable homemade ones), diced
  • 1 medium onion, diced
  • Oil, to taste
  • Salt and pepper, to taste

Procedure

  • Boil whole potatoes, beets, and carrots until cooked through. The beets will take the longest to cook – 45-60 minutes – so put them in first.
  • Meanwhile, dice the pickles and onion and put them in a big bowl.
  • When the root vegetables are cooked, peel the beets and carrots and let cool. When they are cool enough, dice the potatoes, beets, and carrots.
  • Add diced root vegetables to the bowl and season with your preferred amount of oil, salt, and pepper. Mix, and enjoy!


салат шуба (salat shuba)

If you are a mayonnaise lover, you can add it in between every layer. But if you’re like me and are slightly mayo-averse, feel free to only add it to the top layer.

Ingredients

  • 1-3 small-medium potatoes, peeled
  • 1-2 medium beets
  • 1-3 medium carrots
  • 1-2 cups pickled herring, diced
  • Mayonnaise, to taste

Procedure

  • Boil whole potatoes, beets, and carrots until cooked through. The beets will take the longest to cook – 45-60 minutes – so put them in first.
  • Meanwhile, dice the herring and spread it out on a large shallow platter.
  • When the root vegetables are cooked, peel the beets and carrots and let cool. When they are cool enough, grate the potatoes, beets, and carrots but keep them separate.
  • Spread the grated potatoes over the herring, smoothing them into a nice, flat layer.
  • Spread the grated carrots over the potato layer.
  • Spread the grated beets on top of the carrots. Add a couple of tablespoons of mayonnaise and spread it around evenly, letting it mix a little with the beets.
  • This salad looks beautiful when served in clean-cut slices that reveal the colorful layers.
800px-Flag_of_Ukraine-1.svg

Beet Week – Day 1 Ukrainian Style

Adventures in Ukrainian Cuisine: Beets

I have been living in Ukraine as a Peace Corps Volunteer since September 2010 and thus have had plenty of time to taste – and sometimes cook – many traditional Ukrainian dishes. A lot of these dishes include the staple (mainly root) vegetables that grow so easily and abundantly here in eastern Europe: potatoes, carrots, onions, cabbage, and beets.

I have found that beets are the biggest challenge. They are a funny shape, have a thicker skin than potatoes or carrots, and are (usually) a deep red-purple color that stains almost everything it touches. Living in Ukraine for the past year and a half has expanded my how-to-prepare-beets horizons.

Even if you know nothing about Ukraine or eastern Europe, you have probably heard of borscht, beet soup (or stew, as I prefer less water-to-vegetables ratio). Borscht is healthy, offering many nutrients and antioxidants and protein in its meat and/or beans.

There are two main kinds of borscht: green borscht and red borscht. As far as I can tell, the main difference between the two is the green borscht’s lack of beets and slightly different ingredient set (additions to green borscht include preserved young cabbage, dill, and hard-boiled egg). Red borscht is what probably comes to mind when a non-Eastern European thinks of borscht: that rich, reddish-purple soup set off by a dollop of bright white sour cream.

It’s important to note that every borscht is different. Every Ukrainian has her own recipe and it rarely turns out the same twice. Borscht gets better with age; third-day reheated borscht is, by far, the tastiest.

Український Борщ (Ukrainian Borscht), Tammela’s Version

Ingredients:

  • Meat of choice (I used two chicken drumsticks), or beans, or no protein at all
  • 2 medium onions, sliced thinly
  • 3-4 small-medium potatoes, peeled and diced
  • 1 large carrot, peeled and grated
  • 1 large or 2 small-medium beets, peeled and grated
  • 1-2 small-medium tomatoes, grated or chopped
  • 1-2 tbsp tomato paste (depending on how tomatoey you want your borscht to be)
  • ½ head of green cabbage, sliced thinly
  • Oil (Ukrainians use sunflower oil, but canola/vegetable oil would work fine)
  • Salt and pepper, to taste
  • Fresh dill, chopped
  • Optional: bunch of green onions, chopped
  • For serving: dollop of sour cream; hunk of brown bread; peeled raw garlic clove(s)

Procedure:

  • Bring water with meat to a boil, and simmer until it’s mostly cooked (cooking time will depend on the kind of meat you use; chicken cooks fast)Partway through, add the sliced onion to the water.
  • When meat is mostly cooked, add diced potatoes and keep simmering until potatoes are cooked, 10-20 minutes.
  • Meanwhile, grate the carrot, beet, and tomato, and sauté for a few minutes in a pan with some oil.
  • Add sautéed vegetables to the pot and throw in the cabbage, too.
  • Salt and pepper to taste, stir in some tomato paste, add the dill and/or green onions, and let simmer for as long as you like.
  • Serve borscht with a dollop of sour cream (сметана, smetana), a hunk of brown bread (чорний хліб, chornyy khlib), and (if you’re really brave) a clove or two of peeled raw garlic.

If you are not up for trying your hand at borscht, there are a few other beet-sporting Ukrainian dishes, which are often made for holiday meals but are equally as good for regular consumption.  You can check them out here over the next few days as BEET WEEK continues!

~Tammela~

Ready for more delightful beet recipes from the Ukraine?  Click here